Cakewalk // Documentation // SONAR LE // Adding effects (FX)
Table of Contents Previous Next Index


1.
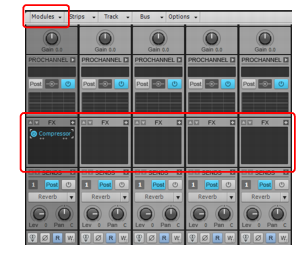
In the Console view, locate the effects bin for the track you’d like to work with. If you don’t see the effects bin, click the Console view Modules menu and make sure FX Bin is selected.
3.
Point to Audio FX, then point to Cakewalk or Sonitus:fx and choose any one of the available effects.
Compressor/Gate. This plug-in affects the loudness of the sound. It can limit how loud a sound can get. It can also limit how soft a sound can get before it's completely turned off.
EQ. EQ can accentuate or turn down a certain frequency range in a sound. For example, if you have an unwanted high-pitched buzz on one of your tracks, an EQ may be able to turn that high frequency down without affecting the sound of the instrument.
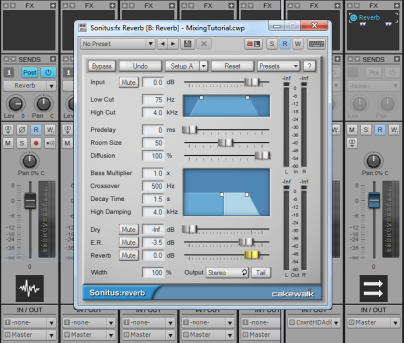
Reverb. Reverb creates an artificial space. It produces echoes that are similar to the natural echoes that happen when a sound bounces off the walls in a room.
Delay. Delay plug-ins have the ability to create an echo. However, it's typically more distinct than that of a reverb. It makes a sound repeat, often in a rhythmic, musical manner.
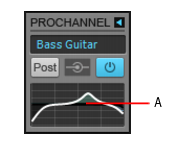
A. Equalizer graph
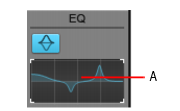
A. EQ plot
1.
Solo the tracks named Tension Climbing and Chirppy Synth.
3.
Grab one of the numbered nodes and drag it around. Boost the selected band until you find the frequency range that interferes with Chirppy Synth. When you find it, turn down the selected band by dragging the node downward.
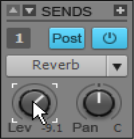
Instead, we will add a single reverb effect to a bus, then send each track to that bus, at varying levels. This is where SONAR's advanced mixing environment offers a lot of flexibility. We will add a control to each track, which adjusts how loud a copy of the track's sound is sent to the bus. This will sound more natural since it's similar to the behavior of an actual acoustic space. All of the different sounds can interact with each other in the “virtual room” we're creating with the reverb.
1.
We want to add this send to all tracks, so go to Edit > Select > All to select all tracks.
2.
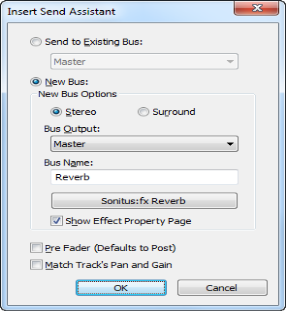
Right-click on one of your tracks in the Sends section of the strip and choose Insert Send Assistant. If you don’t see the Sends section in your Console view, click the Console view Modules menu and make sure Sends/Bank/Patch is selected.
list-image
Click New Bus. This will create a new reverb bus instead of routing the tracks to an existing bus.
list-image
Select Stereo
list-image
In the Name box, type Reverb.
list-image
Click Choose Effect and select Audio Effects > DirectX > Sonitus:fx > Reverb.
list-image
Make sure Pre Fader is not selected.
list-image
Select the Show Effects Property Page check box.
list-image
In the Bus Output list, select Master.
4.
5.
Set the Reverb control to 0.0 dB and the Dry control to -Inf.
Copyright © 2024 Cakewalk, Inc. All rights reserved
Sitemap | Privacy Policy | Legal